
Before you secure them you can check that the antler is sitting properly on the hat. Simply thread all the tails through to the other side and pull them tight. Distributing them out over 4 holes gives it more stability in its position. Position the antlers so they are pointing in the right direction, then decide which holes the tails belong to in order to keep the antler standing in the correct position. They are usually about 6 across from the cross. The top row is in line with the bottom of the cross (2 rows above the brim) and the bottom row is 1 row above the brim. The antler ‘tails’ will be distributed between four stitches (I’ve marked them above with pins to check they’re symmetrical). You will end up with something that looks like this: Do the same with the chains of 3.Īttach the joined chain of three to the chain of 8 approximately 1/3rd of the way down, and weave the tails through so they are all at the same end. You will have all four tails at one end, and a nice solid pipe (if you’re like me it’s very messy :P). Weave the single tail in the same way as you have just done. Continue in this fashion until all v’s in the chain are secured to their opposite.Īfter weaving one tail through, you end up with three tails at one end, and one at the other. The third picture demonstrates the tail going through the second stitch on both chains. Above are two chains of eight.įor each chain place them back to back (so the v’s are facing outwards) and weave the tail back through the chains, the second picture demonstrates the needle weaving one of the tails back through the first stitch on both chains. You can use whatever you like to make the antlers, this is just how I do it.Įach antler has two pairs of chains, which are sewn together. I’ve also thought about using pipe cleaners, which would be much easier to mould and attach, and they come in a bunch of different colours. Planet June has a great tutorial for crocheted i-cords. Make 4 chains in brown yarn, leave long tails:Īs an alternative to this method (which is something I just made up so my explanation is quite poor), you can make an i-cord. As a neater alternative, you could glue on a white felt cross. I double knot the loose strands together tightly, and then cut off the ends so nothing pokes out.

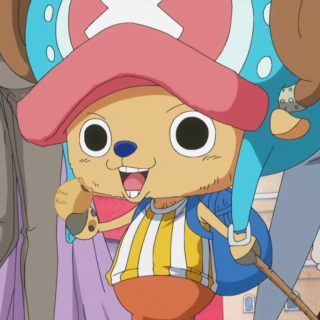
It then goes the same distance across as it does up, so you are left with a 4×4 white cross. I position it so the bottom corners of the cross are two rounds above the brim and the top corners of the cross are six rounds above the brim. If you want to make the hat taller simply add more rows before the FLO. And the last BLO round helps to keep the brim from curling upwards. The front loop only round gives the same effect in the opposite direction. The round worked in the back loop only gives a sharper curve to the top of the hat. Staggering the increases when making the circle makes it easier to lay the piece flat and keep it’s shape, which is good for the flat top we want. sl st x (at this point the exact number of stitches isn’t important, repeat this pattern until you reach your marker again, we’re just giving the brim room to expand) 20. If you get stuck anywhere else, check out the FAQ. I will only ever link products I happily use myself.Ĭheck out some of the below tutorials if you get stuck on any of the stitches or techniques This means I get paid a small fee if you decide to purchase anything at no extra cost to you. Note some of the links on this site are affiliate links. I hope that you enjoy the pattern too, and I’d love to see what you make! Tag on Instagram or send me a link! What materials will you need? Chopper was the first crochet pattern that I made up on my own, so he’s a bit of a special one for me! And, as an added bonus, the hat fits my cat’s head 😽 He’s not the last One Piece crochet pattern I’ll be making! When I first started amigurumi and saw all of the cool characters that people had recreated, I thought about how perfect Chopper would be as an amigurumi doll.


 0 kommentar(er)
